
Wish Kids New Toy!
-

libby - Big Wave Master
- Posts: 2180
- Likes: 0 post
- Liked in: 0 post
- Joined: Sun Oct 24, 2004 5:14 pm
- Location: Southampton
![]() by Driftingalong » Wed Jun 14, 2006 1:42 pm
by Driftingalong » Wed Jun 14, 2006 1:42 pm
(With all that red; it must be pretty fast)
-

Driftingalong - SW Pro
- Posts: 1005
- Likes: 0 post
- Liked in: 0 post
- Joined: Tue Sep 20, 2005 1:45 pm
- Location: OC, MD
-

Laguna - SW Pro
- Posts: 1104
- Likes: 0 post
- Liked in: 0 post
- Joined: Thu Aug 04, 2005 11:54 pm
-

kitesurfer - Surf God
- Posts: 3533
- Likes: 0 post
- Liked in: 0 post
- Joined: Wed Oct 19, 2005 1:20 pm
- Location: In the kitchen making Harmergeddon mead!
-
jennie - Local Hero
- Posts: 413
- Likes: 0 post
- Liked in: 0 post
- Joined: Mon Aug 29, 2005 9:37 pm
- Location: UK London
![]() by kitesurfer » Thu Jun 15, 2006 8:32 am
by kitesurfer » Thu Jun 15, 2006 8:32 am
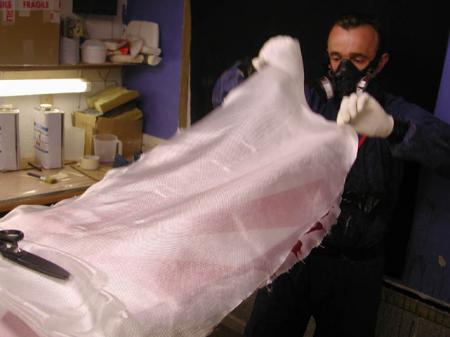
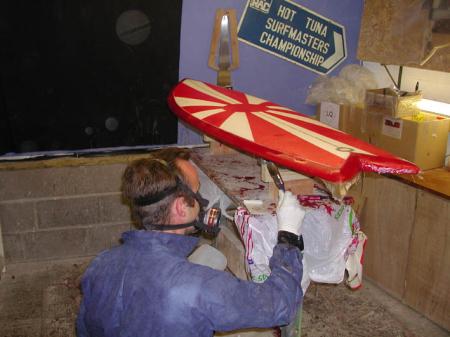
Preparing to glass the deck.
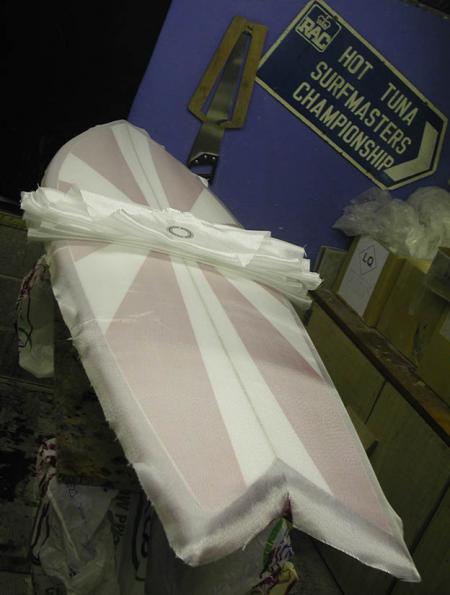
Wetting out the patch panel.
Placing the leash plug decal.
More patch panel work.

More to follow.
-
kitesurfer - Surf God
- Posts: 3533
- Likes: 0 post
- Liked in: 0 post
- Joined: Wed Oct 19, 2005 1:20 pm
- Location: In the kitchen making Harmergeddon mead!
![]() by kitesurfer » Thu Jun 15, 2006 8:36 am
by kitesurfer » Thu Jun 15, 2006 8:36 am
Safely down in the right place.
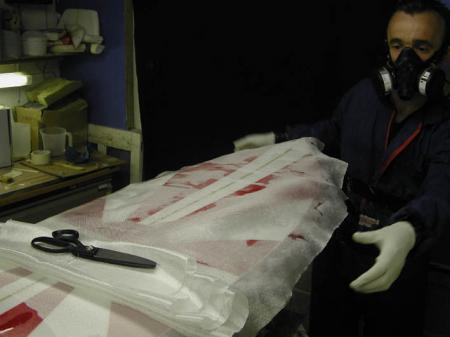
And the tail.
Note the large dry area in the middle where the glass was laying. This needs to be wetted out well next.

More to follow.
-
kitesurfer - Surf God
- Posts: 3533
- Likes: 0 post
- Liked in: 0 post
- Joined: Wed Oct 19, 2005 1:20 pm
- Location: In the kitchen making Harmergeddon mead!
![]() by kitesurfer » Thu Jun 15, 2006 8:38 am
by kitesurfer » Thu Jun 15, 2006 8:38 am
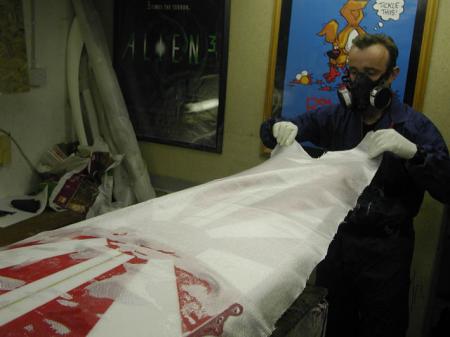
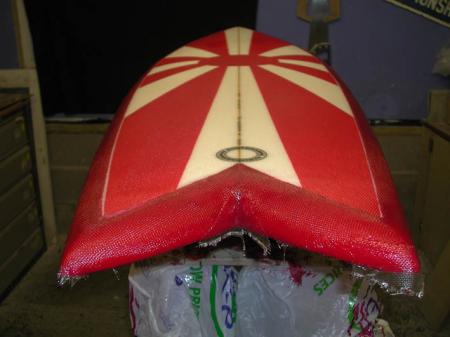
It's starting to look good.
Still need to wet out the laps.
Doing the laps.
Just a few more to go.
-
kitesurfer - Surf God
- Posts: 3533
- Likes: 0 post
- Liked in: 0 post
- Joined: Wed Oct 19, 2005 1:20 pm
- Location: In the kitchen making Harmergeddon mead!
![]() by kitesurfer » Thu Jun 15, 2006 8:44 am
by kitesurfer » Thu Jun 15, 2006 8:44 am
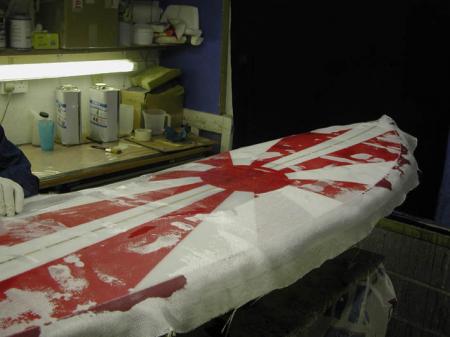
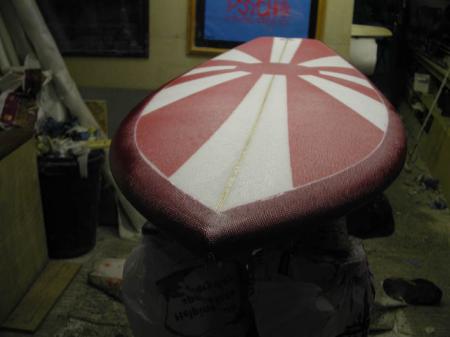
Checking for any dry spots.
A couple of patches to cover areas where the cloth moved. These can be trimmed later.
All done until next week as i'm off to devon tonight.
-
kitesurfer - Surf God
- Posts: 3533
- Likes: 0 post
- Liked in: 0 post
- Joined: Wed Oct 19, 2005 1:20 pm
- Location: In the kitchen making Harmergeddon mead!
![]() by FishKid Wales » Thu Jun 15, 2006 9:49 am
by FishKid Wales » Thu Jun 15, 2006 9:49 am
Have a good crack @ the Goldcoast!
-

FishKid Wales - SW Pro
- Posts: 748
- Likes: 0 post
- Liked in: 0 post
- Joined: Mon Feb 06, 2006 11:04 am
- Location: baa baa land!
![]() by kitesurfer » Thu Jun 15, 2006 10:57 am
by kitesurfer » Thu Jun 15, 2006 10:57 am
-
kitesurfer - Surf God
- Posts: 3533
- Likes: 0 post
- Liked in: 0 post
- Joined: Wed Oct 19, 2005 1:20 pm
- Location: In the kitchen making Harmergeddon mead!
![]() by xswind » Thu Jun 15, 2006 11:02 am
by xswind » Thu Jun 15, 2006 11:02 am
Maybe there is hope for my photography skills yet.
The thing the pictures do not tell is just how stinky Kitesurfer is, opps no I mean the resin.
Keep up the good work there Kitesurfer.
-

xswind - Local Hero
- Posts: 145
- Likes: 0 post
- Liked in: 0 post
- Joined: Thu Jun 15, 2006 10:56 am
- Location: England - South
![]() by kitesurfer » Thu Jun 15, 2006 11:32 am
by kitesurfer » Thu Jun 15, 2006 11:32 am
To those who probably don't know XS Wind is the kind chap who owns the shed in which all of my surfboards are made! Mucho thanks xs for putting up with my stinkyness! And that's not refering to my surfing style!
-
kitesurfer - Surf God
- Posts: 3533
- Likes: 0 post
- Liked in: 0 post
- Joined: Wed Oct 19, 2005 1:20 pm
- Location: In the kitchen making Harmergeddon mead!
![]() by pirate » Sun Jun 18, 2006 5:06 pm
by pirate » Sun Jun 18, 2006 5:06 pm
- pirate
- New Member
- Posts: 10
- Likes: 0 post
- Liked in: 0 post
- Joined: Thu Jun 15, 2006 5:38 pm
![]() by kitesurfer » Tue Jun 27, 2006 4:31 pm
by kitesurfer » Tue Jun 27, 2006 4:31 pm
Those of you going to the summer meet will get to see the big handover, those of you not going will have to wait till next week for the final round of photos. Wouldn't want to spoil the surprise for wish kid now.
-
kitesurfer - Surf God
- Posts: 3533
- Likes: 0 post
- Liked in: 0 post
- Joined: Wed Oct 19, 2005 1:20 pm
- Location: In the kitchen making Harmergeddon mead!
![]() by lowrider_93 » Tue Jun 27, 2006 6:20 pm
by lowrider_93 » Tue Jun 27, 2006 6:20 pm
-

lowrider_93 - Surfer
- Posts: 69
- Likes: 0 post
- Liked in: 0 post
- Joined: Tue Jun 27, 2006 3:29 pm
- Location: P.E.I. Canada
![]() by kitesurfer » Wed Jun 28, 2006 10:01 am
by kitesurfer » Wed Jun 28, 2006 10:01 am
KS
-
kitesurfer - Surf God
- Posts: 3533
- Likes: 0 post
- Liked in: 0 post
- Joined: Wed Oct 19, 2005 1:20 pm
- Location: In the kitchen making Harmergeddon mead!
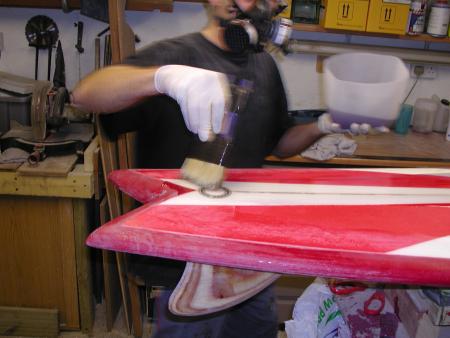
![]() by kitesurfer » Wed Jun 28, 2006 10:22 am
by kitesurfer » Wed Jun 28, 2006 10:22 am
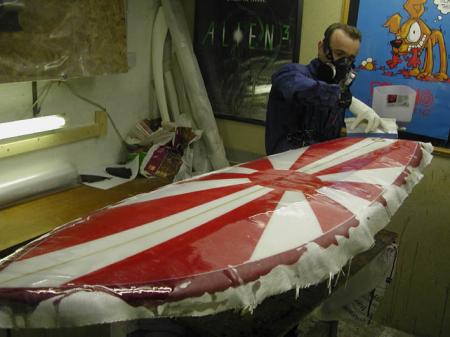
A note to all, duting the build a surfboard goes through many stages, some of which arne't that pretty. But as everything is made from glass when you put on the final sanding or gloss coat all the mess you've made suddenly dissapears. It's like magic. So even with a coloured board like this one all the sanding marks and stuff will go. So the important thing is to make sure the board is smooth and free from dust and debris before the final coats go and you'll be fine. You'll see what i mean in the coming photos.
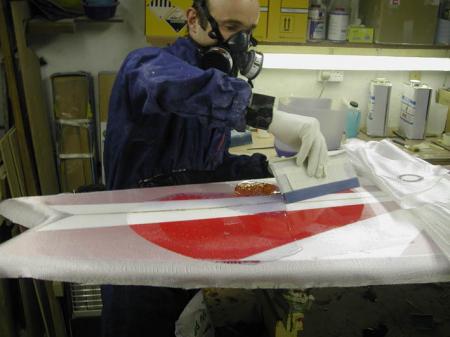
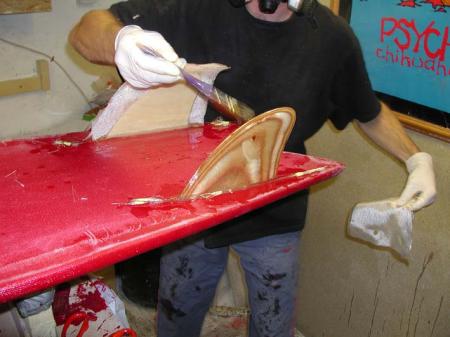
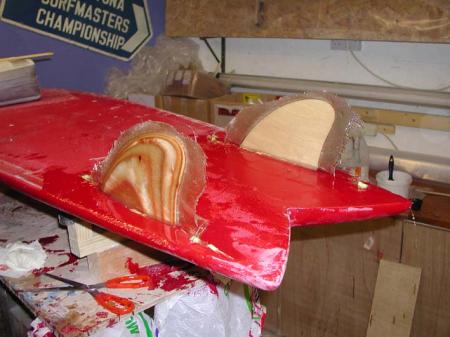
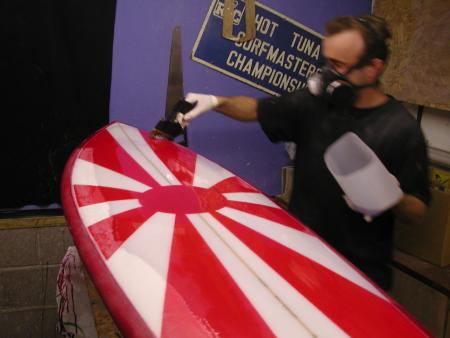
Right here are the fins being fitted.
For this type of homemade keel fin i route a slot in the board to accept a lug i leave on the fin. It makes positioning real easy and since these fins go in with no cant it sets them at the right angle 90 degrees
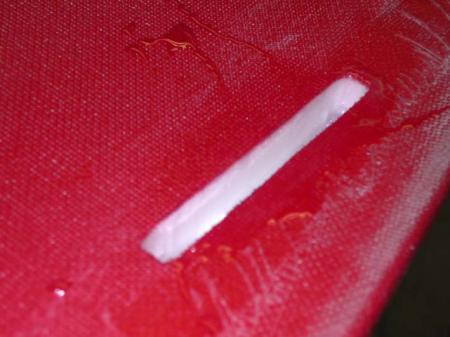
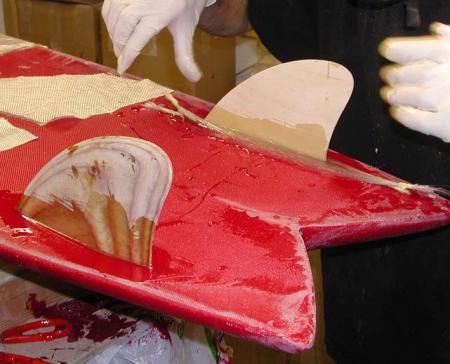
All the bits assembled prior to glassing the fins in. 6oz patches, fibreglass rovings taped at the ends and made into rope by twisting. These make the fillets to the board.
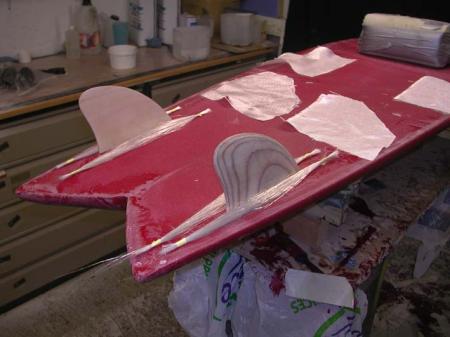
Filling the slots with resin to give extra bond and watertightness to the fins.
Sticking the fins in.
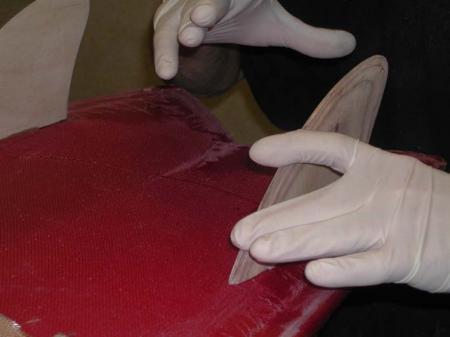
You need to work quite quickly to get everything done when fin fitting so don't worry about making a mess.
More to follow.
-
kitesurfer - Surf God
- Posts: 3533
- Likes: 0 post
- Liked in: 0 post
- Joined: Wed Oct 19, 2005 1:20 pm
- Location: In the kitchen making Harmergeddon mead!
![]() by kitesurfer » Wed Jun 28, 2006 10:25 am
by kitesurfer » Wed Jun 28, 2006 10:25 am
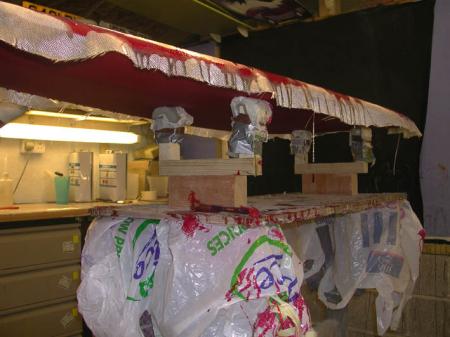
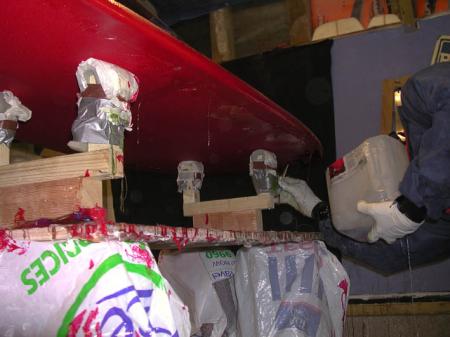
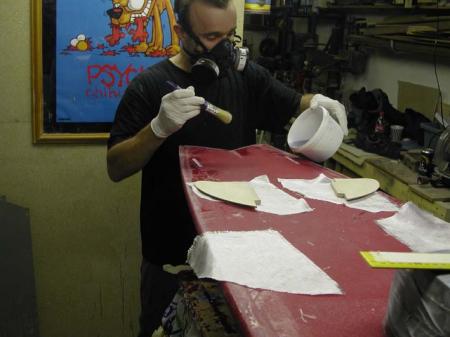
Painting the fins with resin to wet out the patches.
Fitting the patches and getting everything nice and wet.
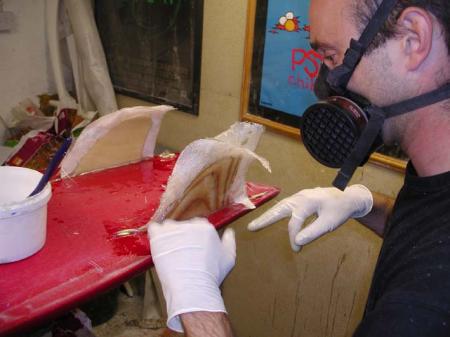
Leave to go off until the resin has gone green and gelled then trim with a stanley blade. Don't forget to trim the ends of the rope as well.
Cheers KS
-
kitesurfer - Surf God
- Posts: 3533
- Likes: 0 post
- Liked in: 0 post
- Joined: Wed Oct 19, 2005 1:20 pm
- Location: In the kitchen making Harmergeddon mead!
![]() by kitesurfer » Mon Jul 03, 2006 11:44 am
by kitesurfer » Mon Jul 03, 2006 11:44 am
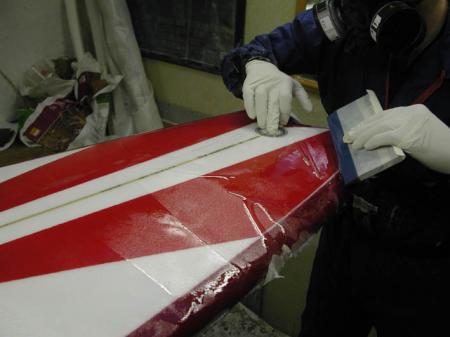
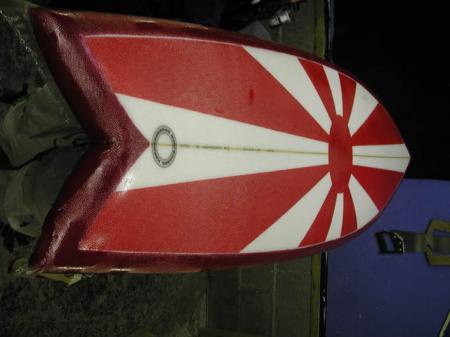
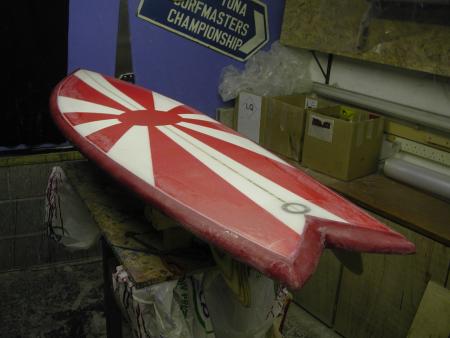
This is what you can expect a board to look like after sanding and prior to hot-coating. For those of you that arne't aware a hot coat is basically a sanding coat and is the final coat that makes your board look all nice and smooth. (gloss coats are basically an additional hot coat added for polishing)
The hot coat is basically a mix of resin with an additive known as wax in styrene added. This wax finds it's way to the surface of the resin and allows it to be sanded easily.
Note! This product is called 5% wax in styrene. It does not mean you add 5% to your resin. The actual amount you add is between 1 and 2%.
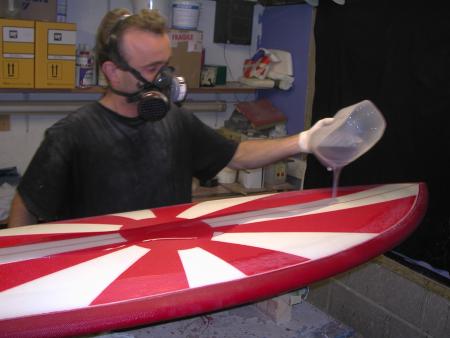
The resin gets poured on and spread around using a paint brush.
Lengthways first followed by sideways then lengthways again. Keep an eye for stray hairs and make sure you get an even layer all over the board. I do the deck first with no masking used and just let the resin drip around the rails. Then the bottom gets done, not forgetting to do the fins if using glassed on fins.
I mask off the deck when doing the bottom as this helps with sanding in the rails around the tail and fins. Quite important to get the transistion from sharp rails to soft at the right spot and smooth.
More to follow.
-
kitesurfer - Surf God
- Posts: 3533
- Likes: 0 post
- Liked in: 0 post
- Joined: Wed Oct 19, 2005 1:20 pm
- Location: In the kitchen making Harmergeddon mead!
Similar topics
Shop

Latest
-
11 hours ago by JamesHsouthaus5 comments
-
2 days ago by Kulharin3 comments
-
12 days ago by Swimmy Tim5 comments
-
13 days ago by BaNZ3 comments
-
19 days ago by BoMan6 comments
-
22 days ago by hannaconner5 comments
-
1 month ago by BaNZ4 comments
-
1 month ago by HaoleKook4 comments